
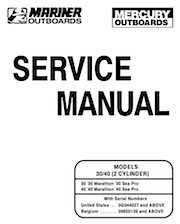
1997+ Mercury 35/40HP 2 Cylinder Outboard motor Service Manual PN 90-826148R2
- Home
- Outboard motors
- Mercury
- Mercury 35 40HP 2 Cylinder Outboards Service Manual PN 90 826148R2
Original service manual with hundreds of high quality diagrams. Manual is searchable and indexed.
This is the Official Service Manual that the dealers and shops use. This manual cover specifications, diagnosis and testing, component removal, teardown and rebuild.
Manual is very detailed with good diagrams, photos and exploded views.
A must for anyone who insists on Genuine OEM quality parts.
Manual topics include:
- Important Information and Specifications
- Electrical and Ignition
- Wiring Diagrams
- Fuel System and Carburation
- Powerhead
- Mid-Section and Power Trim
- Lower Unit
- Attachments/Control Linkage
- Manual Starter
30hp, 30hp Marathon, 30hp Sea Pro, 40hp, 40hp Marathon, 40hp Sea Pro | 15" and 20" shafts | Manual and Electric Start
U.S. serial numbers 0G044027 and above | Belgium serial numbers 09855139 and above
Year 1997 and above | p/n 90-826148R2 | Mercury Marine


To find information in PDF file please use "Ctrl+F" or "Command+F" for Mac and enter keywords you need to find in a manual.
File will be available for download in minutes!
 "1997+ Mercury 35/40HP 2 Cylinder Outboard motor Service Manual PN 90-826148R2" manual can be saved to any computer hard drive, flash storage, burned to a CD or DVD ROM or any other digital media.
This Manual PDF file is:
- + Printable: Yes
- + Viewable on: MS Windows, Mac, Android, iOS, Linux
- + Requires: Adobe Acrobat/Preview
Once manual is downloaded any number of pages could be printed or it could be printed in whole.
Manual could be opened in Adobe Acrobat on any mobile device (like iPad, iPhone or Android device etc.) any computer capable of viewing a PDF files including IBM compatible computers running Windows, Linux (or any other flavor of UNIX). Apple Computers have native support for PDF files.
Reference and Info files
Reviews - Write a Review
Rated: 5 by: Adam Boothe Posted: Thursday, April 3, 2014 at 10:41AM
Rated: 5 by: Jon Posted: Sunday, August 13, 2023 at 5:36PM
Makes it much easier to work on my motor.
Full list of manual chapters:
Cover
MODELS 30/40 (2 CYLINDER)
Notice
Notice to Users of This Manual
Cleanliness and Care of Outboard Motor
Page Numbering
Service Manual Outline
SPECIFICATIONS
Table of Contents
General Specifications
MAINTENANCE
Table of Contents
Specifications
Special Tools
Quicksilver Lubricant/ Sealant
Inspection and Maintenance Schedule
Before Each Use
After Each Use
Every 100 Hours of Use or Once Yearly, Whichever Occurs First
Every 300 Hours of Use or Three Years
Before Periods of Storage
Lubrication Points
(S/N-0G590000 and Above)
(S/N-0G589999 and Below)
Checking Power Trim Fluid
Gear Case Lubrication
Draining Gear Case
Checking Lubricant Level and Filling Gear Case
Propeller Replacement
Removal
Installation
Corrosion Control Anode
Fuel Tank
Flushing The Cooling System
Storage
Fuel System
Protecting External Outboard Components
Protecting Internal Outboard Components
Gear Case
Positioning Outboard for Storage
Battery Storage
GENERAL INFORMATION
Table of Contents
Serial Number Location
Conditions Affecting Performance
Weather
Boat
Engine
Following Complete Submersion
Salt Water Submersion (Special Instructions)
Submerged While Running (Special Instructions)
Submerged Engine (Fresh Water)(Plus Special Instructions)
Propeller Selection
Propeller Information Chart - 30 HP
Propeller Information Chart - 40 HP
OUTBOARD MOTOR INSTALLATION
Table of Contents
Notice to Installer and Owner
Boat Horsepower Capacity
Outboard Remote Control
Selecting Accessories For The Outboard
Selecting Steering Cables and Remote Control Cables
Locate Centerline Of The Outboard
Lifting Outboard
Installing Outboard to Boat Transom
Models Without Transom Bracket Thumb Screws
Models With Transom Bracket Thumb Screws
Single Steering Cable and Steering Link Rod Installation
Installing Ride Guide Steering Cable To The Outboard
Steering Link Rod Installation
Remote Control Installation
Required Side Mount Remote Control or Ignition Key Switch Assembly
Boats Equipped with Side Mount Remote Control
Boats Equipped with Panel Or Console Mount Remote Control
Remote Wiring Connections
Electric Start Remote Control Model
Manual Start Models Using Quicksilver 2000 Series Side Mount Remote Control
Shift and Throttle Cable Installation To The Outboard
Shift Cable Installation
Throttle Cable Installation
Battery Connections
Set Up Instructions For Oil Injection System
Filling The Oil Injection System
Bleeding Air From The Oil Injection System
Adjusting The Oil Injection Pump
Propeller Installation
Tilt Pin Adjustment
Trim Tab Adjustment
IGNITION
Table of Contents
Specifications
Special Tools
Stator/Trigger (Electric Models)
Starter Motor Components
Electrical Components (S/N-0G380074/Bel-Manual-9928507/Bel-Elec-9928480 and Below)
Electrical (S/N-USA-0G380075 Thru 0G589999/Bel-Manual-9928508/Bel-Elec-9928481 Thru 9973099)
Electrical Components (S/N-USA-0G590000/Bel-9973100 and Above)
Theory of Operation
Ignition Component Discription
Principle of Operation with Timing Protection Module (TPM)
Mercury/Mariner 30/40 (2 cyl.) ADI Ignition System (With Electronic Spark Advance)
Principle Of Operation, CDM without Timing Protection Module (TPM)
Trigger Coil
Stator
Capacitor Discharge Modules (CDM)
Flywheel
Theory of Operation
Capacitor Charging #1 CDM
Capacitor Charging #2 CDM
#1 Cylinder Trigger Circuit
Ignition Coil Circuit
Stop Circuit
Ignition Test Procedures
Direct Voltage Adapter (DVA) Test for Stator
Ignition Diagnostic Procedures
Testing Ignition Components
Ignition Components Removal
CHARGING and STARTING SYSTEM
Table of Contents
Specifications
Special Tools
Battery
Precautions
Recommended Battery
Operating Engine Without Battery
Specific Gravity Readings
Specific Gravity Cell Comparison Test
Electrolyte Level
Charging a Discharged Battery
Winter Storage of Batteries
Battery Charging System (14 or 18 Ampere Alternator)
Description
Battery Charging System Troubleshooting
Stator Ohms Test-Alternator Coils Only
Alternator System Test
Rectifier Test
Voltage Regulator/Rectifier Test - Models with (S/N-0G590000 and Above)
Starting System
Starter Motor Amperes Draw
Starting System Components
Description
Troubleshooting the Starting Circuit
Starting Circuit Troubleshooting Flow Chart
Starter Motor
Removal
Disassembly
Cleaning and Inspection Testing
Brush Replacement
Reassembly
Installation
TIMING, SYNCHRONIZING and ADJUSTING
Table of Contents
Specifications
Special Tools
Tiller Handle Model (S/N-0G589999 and Below)
Timing Adjustments
Tiller Handle Model with Mechanical Spark Advance (S/N-0G590000 and Above)
Shift Link Rod Installation and Adjustment to Engine
Throttle Cable Installation
Oil Pump Adjustment
WIRING DIAGRAMS
Table of Contents
30/40 Manual Start Ignition Diagram (S/N 0G380074 and Below)
30/40 Manual Start Ignition Diagram (S/N 0G380075 Thru S/N 0G589999)
30/40 Electric Start/Tiller Handle Ignition Diagram (S/N 0G380074 and Below)
30/40 Electric Start/Tiller Handle Ignition Diagram (S/N 0G380075 Thru S/N 0G589999)
30/40 Electric Start Ignition Diagram (S/N 0G380074 and Below)
30/40 Electric Start Ignition Diagram (S/N 0G380075 Thru S/N 0G589999)
30/40 Manual Start/Tiller Handle Ignition Diagram (S/N-0G590000 and Above)
30 Electric Start Tiller Handle Ignition Diagram (S/N-0G590000 and Above)
30/40 Electric Start Ignition Diagram (S/N-0G590000 and Above)
30/40 Electric Start/Power Trim Ignition Diagram (S/N-0G590000 and Above)
14 Ampere Stator Charging Diagram
14 Ampere Stator Charging Diagram With Battery Isolator
Commander 2000 Side Mount Remote Control (Electric Start With Warning Horn) Wiring Diagram
Commander 3000 Panel Mount Control
Commander 2000 Key Switch Test
Instrument Wiring Connections
Without Light Switch
With Light Switch
Instrument/Lanyard Stop Switch Wiring Diagram
Engine Synchronizer Wiring Diagram-Commander Gauges
Instrument/Lanyard Stop Switch Wiring Diagram (Dual Outboard)
QSI Gauge Wiring Diagrams
Tachometer Wiring Diagram
Water Temperature Gauge
Engine Synchronizer Wiring Diagram
FUEL PUMP
Table of Contents
Specifications
Fuel Pump (Manual)
Fuel Pump (Electric)
Theory of Operation
Troubleshooting
Checking For Restricted Fuel Flow Caused By Anti-siphon Valves
Testing
Reassembly
Check Valve Assembly
Fuel Pump Assembly
CARBURETOR
Table of Contents
Specifications
WME Carburetor Specifications
Jet Orifice Size Chart
Special Tools
Carburetor
Fuel System Fuel Flow
Manual Start Models
Electric Start Models
Electric Start Tiller Handle Models
Carburetor Adjustments
Initial Starting Adjustment
Idle Speed Adjustment
Idle Mixture Screw Adjustment
Carburetor Float Adjustment
Main (High Speed) Jet Adjustment
Rejetting Carburetors For High Altitude Operation
Fuel System Troubleshooting
Enrichener System (Electric Start Models)
Enrichener Valve Test
OIL INJECTION
Table of Contents
Specifications
Oil Injection Components
Theory of Operation
Oil Injection System
Oil Injection Flow System (Variable Ratio Oil Pump) S/N-0G589999 and Below
Oil Injection Flow System (Variable Ratio Oil Pump) S/N-0G590000 and Above
Pump Drive Assembly (Variable Ratio Oil Pump)
Adjustments
Carburetor/Oil Pump Synchronization
Troubleshooting
Bleeding Air From Oil Injection System
Oil Pump Volume (Flow) Test
POWERHEAD
Table of Contents
Specifications
Special Tools
Cylinder Block Components
Induction Manifold
Crankshaft/Piston/Flywheel
Torque Sequence Powerhead Removal
Crankshaft Disassembly
Crankshaft Inspection
Piston and Connecting Rod Disassembly
Connecting Rods
Cleaning and Inspection
Cylinder Block and Crankcase Cover
Cylinder Bores
Pistons and Piston Rings
Check Valve
Thermostat
Reed Blocks
Powerhead Reassembly and Installation
General Information
End Cap
Assembling Rod to Piston
Piston Ring Installation
Crankshaft Installation
Installing Rods to Crankshaft
Connecting Rod Cap Alignment
Crankcase Cover to Block
Intake/Reed Block Manifold Installation
Thermostat Cover Installation
30/40 Bleed Hose Routing
Powerhead Installation
Test Run Procedure
Break- in Procedure
CLAMP/SWIVEL BRACKETS AND DRIVE SHAFT HOUSING
Table of Contents
Clamp Bracket Components
Swivel Tube Components
Swivel Bracket Components
Drive Shaft Housing Components
Driveshaft Housing Components
Drive Shaft Housing Disassembly/ Reassembly
POWER TRIM
Table of Contents
Special Tools
Power Trim Components
Power Trim Mounting
Theory Of Operation
Adjustments
Trimming Characteristics
Trailering Outboard
Tilting Outboard Up and Down Manually
Trim "In" Angle Adjustment
Power Trim Flow Diagrams
Trim Up
Tilt Up
Maximum Tilt
Down Mode
Shock Function Up
Shock Function Return
Manual Tilt
Troubleshooting
Preliminary Checks
Hydraulic System Troubleshooting Flow Chart
Troubleshooting the Power Trim Electrical System
Power Trim System Removal
Disassembly
Shock Rod Removal
Shock Rod Disassembly
Memory Piston Removal
Trim Motor Removal
Oil Pump Removal
Tilt Relief Valve Removal
Suction Seat Removal
Pilot Check Valve Assembly Removal
Cleaning/Inspection/Repair
Trim Motor Electrical Tests
Reassembly
O-Ring and Seal Placement
Suction Seat Reassembly
Power Trim Reassembly
Tilt Relief Valve Reassembly
Pilot Check Valve Reassembly
Oil Pump Reassembly
Trim Motor Reassembly
Shock Rod Reassembly
Shock Rod Installation
Manual Release Vavle Installation
Bleeding Power Trim Unit
Power Trim System Installation
GAS ASSIST MANUAL TILT
Table of Contents
Clamp Bracket (Gas Assist Trim)
Hydraulic Assist Adjustments
Manual Trim System Removal
Manual Trim System Installation
LOWER UNIT
Table of Contents
Specifications
General Service Recommendations
Bearings
Seals
Special Tools
Gear Housing Components (Drive Shaft)
Gear Housing Components (Propeller Shaft)
Draining and Inspecting Gear Lubricant
Propeller Removal
Gear Housing Removal
Water Pump Seals
Inspection
Upper Drive Shaft Bearing
Pinion Gear Bearing
Pinion Gear
Forward Gear
Shift Shaft
Propeller Shaft Disassembly
Propeller Shaft and Carrier Inspection
Clutch Dog
Cam Follower
Reverse Gear
Reverse Gear Bearing
Bearing Carrier
Gear Housing Reassembly
Shift Shaft Assembly
Pinion Bearing Race
Forward Gear
Pinion Gear/Drive Shaft Assembly
Propeller Shaft
Bearing Carrier
Water Pump
Gear Housing Pressure Test
Gear Housing Installation
Filling Gear Housing with Lubricant
Installing Gear Housing to Drive Shaft Housing
Trim Tab Adjustment and Replacement
Propeller Installation
THROTTLE/SHIFT LINKAGE
Table of Contents
Throttle Linkage Components (S/N-0G589999 and Below)
Throttle Linkage (S/N-0G590000 and Above)
Bottom Cowl/Shift Components
TILLER HANDLE
Table of Contents
Tiller Handle Components
Tiller Handle
Adjustments Tiller Handle Model (S/N-0G589999 and Below)
Adjustments Tiller Handle Model with Mechanical Spark Advance (S/N-0G590000 and Above)
MANUAL STARTER
Table of Contents
Manual Start Components
Rewind Starter Disassembly
Cleaning and Inspection
Rewind Starter Reassembly
Adjusting Rewind Spring Tension
Starter Interlock Cable Adjustment
![]()
![]()


